C05 - Metrology for joining processes and joints
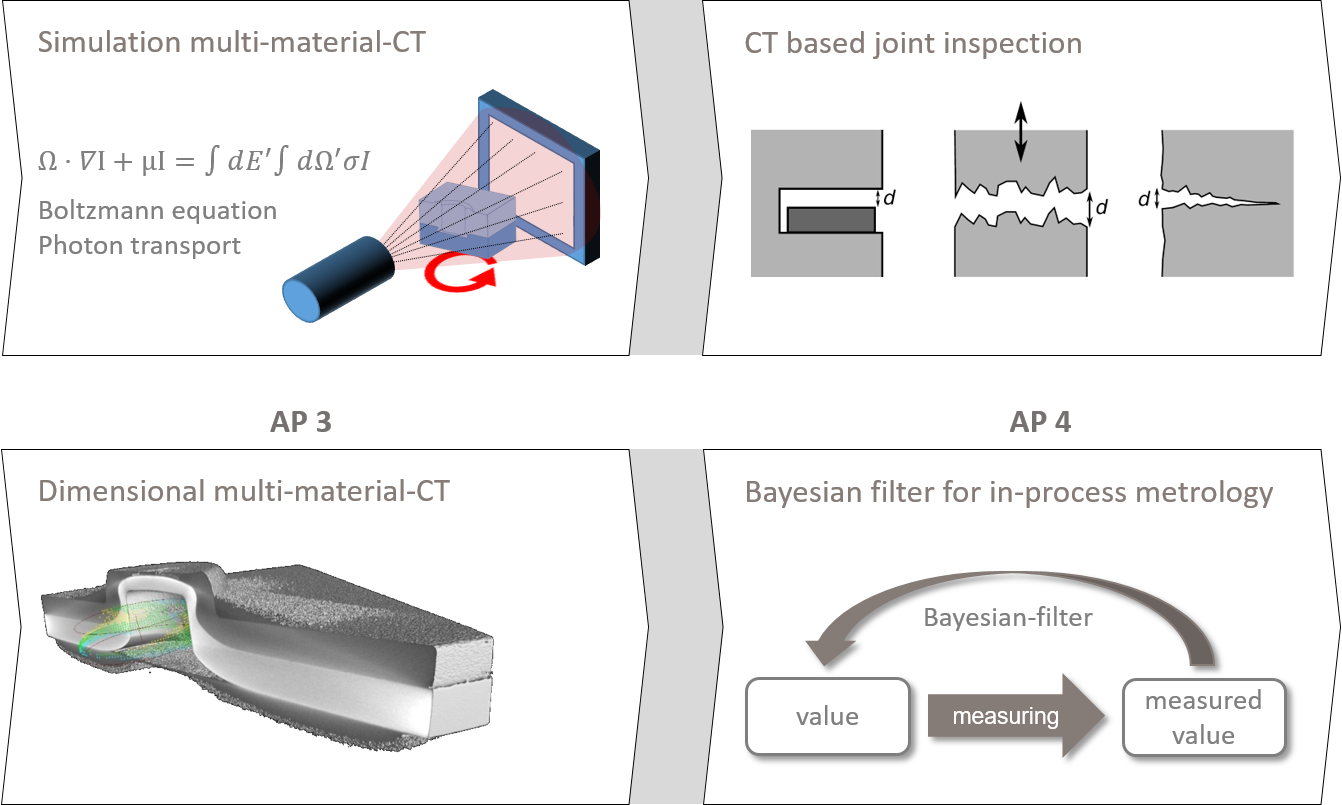
Mechanical joining processes produce assemblies that are mechanically stressed due to the process and can therefore already be damaged during the manufacturing process. Furthermore, geometric deviations can occur in the function-relevant features of a joint. In this context, both a reliable in-process measurement of the joining process parameters and a non-destructive geometric post-process inspection for subsequent quality control are required. A method should be developed that contributes to an increase in the robustness of established joining processes by improving the in-process measurement. Another method contributes to a reliable assessment of the effects of process changes with computed tomographic post-process measurements, for which a crack-measurability limit is to be specified and shall add to the variability. For in-process measurement technology, dynamic real-time measurement uncertainty estimators based on a Bayesian approach are developed in cooperation with subprojects applying joining processes, which allow an improvement in accuracy and a measurement uncertainty statement for joining process parameters. For post-process inspection, this sub-project focuses on increasing measurability through artefact reduction and specifying a crack resolution limit for X-ray computed tomography (CT) measurements. Here, the focus of the investigations is non-destructive testing for qualitative statements on the formation of joining points and a dimensional measurement for checking the geometry of the joined component. For non-destructive testing, the question is adressed which surface defects can be clearly identified taking into account the metrological structure resolution as well as the interface structure resolution. For dimensional measurement with CT, multi-material components from the joining process represent an unsolved challenge in terms of measurability or achievable accuracy due to the error-prone surface determination both at the inner interfaces and in mono-material areas. By Using intelligently chosen multiple measurements as well as simulative prior knowledge, a detection of the interfaces and a more accurate measurement of the surfaces can be achieved. Finally, the geometry and damage of joints, also for modified joining processes, can be detected more accurately by CT measurements and the detectability can be predicted a priori. Bayesian filters can be used to measure process variables more accurately and provide real-time measurement uncertainty information.
Metrologie für Fügeverbindungen
Publications
Determination of the Interface Structural Resolution of an Industrial X-Ray Computed Tomograph Using a Spherical Specimen and a Gap Specimen Consisting of Gauge Blocks
M. Busch, T. Hausotte, Key Engineering Materials 883 (2021) 41–48.
Joining suitability of cast aluminium for self-piercing riveting
M. Neuser, F. Kappe, M. Busch, O. Grydin, M. Bobbert, M. Schaper, G. Meschut, T. Hausotte, IOP Conference Series: Materials Science and Engineering (2021).
Über die Abgrenzung von Auflösungskonzepten in der industriellen Computertomografie
F. Binder, T. Hausotte, Tm - Technisches Messen 89 (2022) 20–24.
Herausforderungen bei computertomografischen Untersuchungen von Fügeverbindungen
M. Busch, L. Butzhammer, T. Hausotte, Tm - Technisches Messen 89 (2022) 83–88.
Application of an edge detection algorithm for surface determination in industrial X-ray computed tomography
M. Busch, T. Hausotte, Production Engineering (2022).
Atomic Force Microscope with an Adjustable Probe Direction and Integrated Sensing and Actuation
J. Schaude, T. Hausotte, Nanomanufacturing and Metrology 5 (2022) 139–148.
Approach to Determine the Characteristic Dimensions of Clinched Joints by Industrial X-ray Computed Tomography
M. Busch, D. Köhler, T. Hausotte, R. Kupfer, J. Troschitz, M. Gude, in: 2022.
Clinching of Aluminum Materials – Methods for the Continuous Characterization of Process, Microstructure and Properties
R. Kupfer, D. Köhler, D. Römisch, S. Wituschek, L. Ewenz, J. Kalich, D. Weiß, B. Sadeghian, M. Busch, J.T. Krüger, M. Neuser, O. Grydin, M. Böhnke, C.R. Bielak, J. Troschitz, Journal of Advanced Joining Processes 5 (2022).
Calibration of 3D scan trajectories for an industrial computed tomography setup with 6-DOF object manipulator system using a single sphere
L. Butzhammer, A.M. Müller, T. Hausotte, Measurement Science and Technology 34 (2022).
Approach to Determine the Characteristic Dimensions of Clinched Joints by Industrial X-ray Computed Tomography
M. Busch, D. Köhler, T. Hausotte, R. Kupfer, J. Troschitz, M. Gude, E-Journal of Nondestructive Testing 27 (2022).
Dynamic conformity assessment for joining force monitoring using Bayes filters
L. Butzhammer, F. Kappe, G. Meschut, T. Hausotte, in: Materials Research Proceedings, Materials Research Forum LLC, 2023.
Simulation-based investigation of the metrological interface structural resolution capability of X-ray computed tomography scanners
M. Busch, T. Hausotte, Journal of Sensors and Sensor Systems 12 (2023) 1–8.
Non-destructive testing in versatile joining processes
M. Lechner, T. Borgert, M. Busch, A. Harms, P.K. Holtkamp, D. Römisch, S. Wituschek, F. Kappe, in: Materials Research Proceedings, Materials Research Forum LLC, 2025.
Show all publications


